I'm linking up this morning to
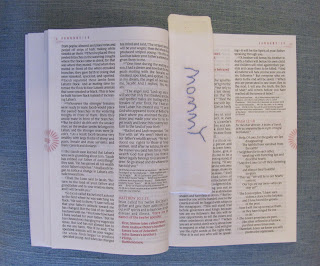
This bookmark is a very simple and easy. I have embroidered exactly once before and am no where near any good at it. It took me about an hour from start to finish. But I think it turned out cute and it would make a great Mother's Day gift for a mom or grandma.
Supplies:
Small piece of cotton fabric- I used a piece of a kitchen towel I had cut up; it feels like a thin twill fabric
Water soluble marking pen
Embroidery hoop
Embroidery thread and needle
Sewing machine, thread, scissors or rotary cutter and mat, ruler
Iron
1. Have your child write on your piece of fabric using the water soluble pen. Keep the writing about 1 in tall so your bookmark isn't huge. You could write something on it instead or have them write just about anything they wanted. This bookmark is for me, so Caroline (she's 4) wrote Mommy on it. Put the fabric in your embroidery hoop.
2. Using 2-3 strands of embroidery thread, embroidery over the writing. I am brand-new at embroidery so mine doesn't look the greatest. I used a back stitch on all the letters and learned how to do the stitch from here. I used 2 strands of thread but I think I would probably like the look of 3 strands better.
3. Remove your fabric from your hoop and use a wet sponge to get rid of all the markings of the water soluble pen. Do this before ironing or the iron will set the pen marks and they won't come off. Then iron your fabric until it's dry.
4. Fold your fabric in half so that the words are on top and cut out the shape of your bookmark, including seam allowances. I wanted my bookmark to be about 1.5" x 6.5" so I cut a 2.25" x 7" rectangle. My fold is along the top of the bookmark in the picture below.
5. Once cut, unfold and refold with right sides together.
6. Using your sewing machine, sew all the way around the edges, with a 1/4" seam allowance. Make sure to leave a place open for turning. As I sewed around, I made a larger seam on one side so that my embroidery was more centered in the bookmark, because I hadn't done a very good job of centering it when I cut the fabric. You can kinda see it in the picture below.
7. Trim corners, and clip threads.
8. Turn fabric right side out and push out corners. Iron nice and flat.
9. Topstitch all the way around, making sure to catch your opening so it's closed. And you are done!!
I am going to use my bookmark in my one year bible that I am reading.


This is such a sweet idea - you could do so many other ideas with it too! And thanks for the book suggestion, I will definitely have to check that out! Have a wonderful weekend!
ReplyDeletethis is so special and cute!
ReplyDeleteeven though im a twenty something maybe i should make one for my mama!
abranconier.blogspot.com